Getting started with plugins
This page explains how to set up a plugin project using the Base Barotrauma Plugin template, which is the starting point used by most Barotrauma plugins.
Requirements
Before getting started, make sure you have an IDE that supports .NET 8:
- Visual Studio 2022 or later (with C# 10 support): https://www.visualstudio.com/vs/community/
- JetBrains Rider: https://www.jetbrains.com/rider/
It is also recommended to have Git installed:
- Windows: download from https://git-scm.com/install/windows
- Linux: install Git using your distribution’s package manager
Getting the project
There are two ways to obtain the project.
Option 1: Use the GitHub template (recommended)
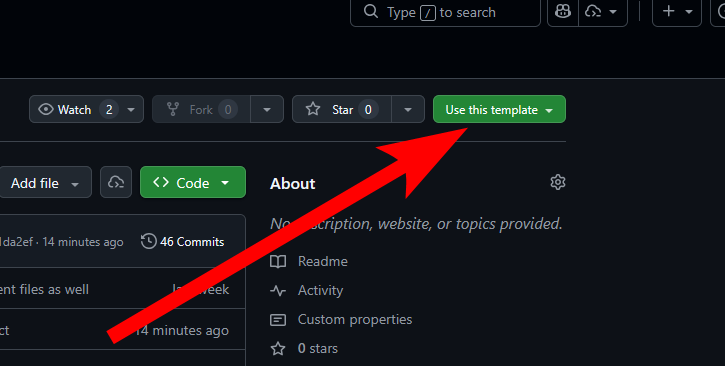
- Create or sign in to a GitHub account.
- Click the Use this template button in the top-right corner of the BaseBaroPlugin repository.
- Clone your newly created repository locally:
git clone https://github.com/your_username/your_repo_name
Option 2: Download directly
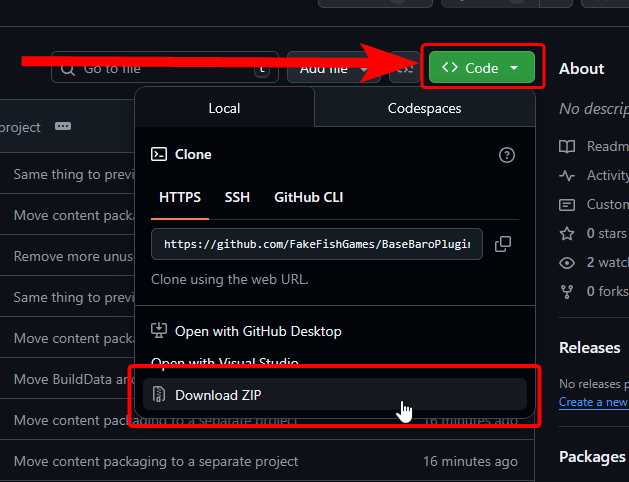
You can also download the repository as a ZIP file from GitHub and extract it locally. This option does not include version control.
Setting up the project
Before opening the project, a few configuration steps are required. .props files can be edited using any text editor.
- Edit the file
BuildData.propsand replaceBaseModwith your actual mod name. - Find the file
UserBuildData.props.exampleand create a copy namedUserBuildData.props.- Edit
UserBuildData.props. - Update the
ModDeployDirvalue so it points to the LocalMods directory of your Barotrauma installation.
- Edit
Opening the project
You can now open the solution file WindowsSolution.sln (or the appropriate solution for your platform: LinuxSolution.sln or MacSolution.sln).
If the .sln file does not open, make sure you have a compatible .NET IDE installed.
Once the solution is open, start by editing Plugin.cs, located in the SharedProject in the solution explorer. You may also rename the existing ExampleMod namespaces in the code to whatever fits your mod.
The plugin class
Plugin.cs contains the plugin’s entry point, a class implementing IBarotraumaPlugin. The game calls three of its methods:
Init()when the plugin is loaded, before the rest of your mod’s content. Register everything your plugin does here: hooks, item components, commands, settings and so on. Your own mod’s XML content isn’t loaded yet at this point.OnContentLoaded()once the rest of your mod’s content has been loaded. Use it for anything that needs your own items or other XML content.Dispose()when the plugin is unloaded, for example when the mod is disabled. Clean up anything the game doesn’t clean up for you, see Plugin unloading.
Get services with PluginServiceProvider.GetService<T>() in static fields or in Init(). See Plugin services for what a plugin can register.
Project structure
- Server-side code:
ServerProject/ServerSource - Client-side code:
ClientProject/ClientSource - Shared code (used by both client and server):
SharedProject/SharedSource
Within the SharedProject, you can use the CLIENT and SERVER preprocessor symbols to conditionally compile code for the client or the server as needed:
#if SERVER
DebugConsole.NewMessage("Hello from server");
#endif

#if CLIENT
DebugConsole.NewMessage("Hello from client");
#endif
Content
All mod content (XML files, sounds, textures, etc.) should be placed in ContentPackageBuilder/Content.
All files you put here are automatically copied to your ModDeployDir. You can trigger this manually by right-clicking the ContentPackageBuilder project and selecting Build.
If you add new XML content, make sure to update the file list located at ContentPackageBuilder/filelist.xml. See content packages for more information about the file list.
Testing your mod
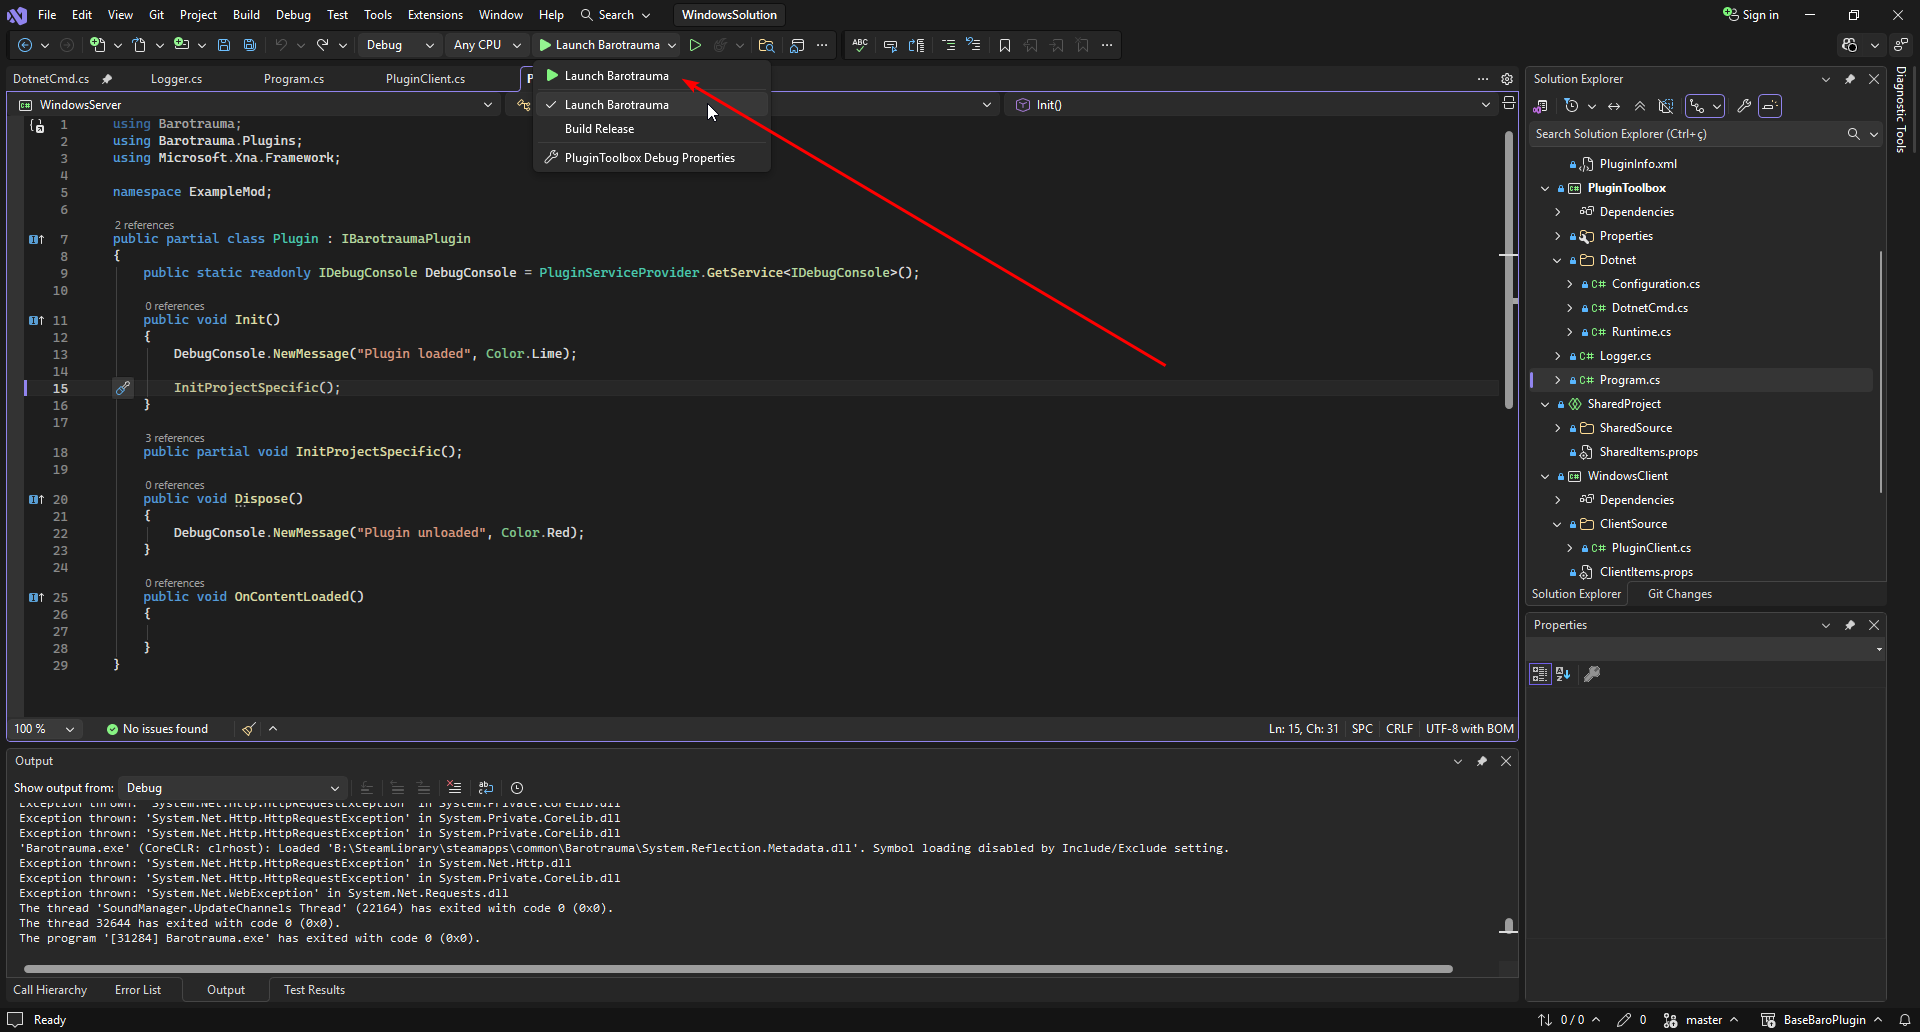
You can test your mod by pressing the Launch Barotrauma button in the toolbar. This launches Barotrauma with the debugger attached and your plugin built.
Building the plugin also automatically generates the mod in the LocalMods folder you configured earlier. You can then enable the mod in-game.
You can also manually right-click WindowsClient and WindowsServer in the solution view and select Build. This does the same as above, without launching Barotrauma.
Warning: this method builds the mod in the Debug configuration. To properly publish or update your mod, follow the steps below.
Building for release
Change the launch option from Launch Barotrauma to Build Release:
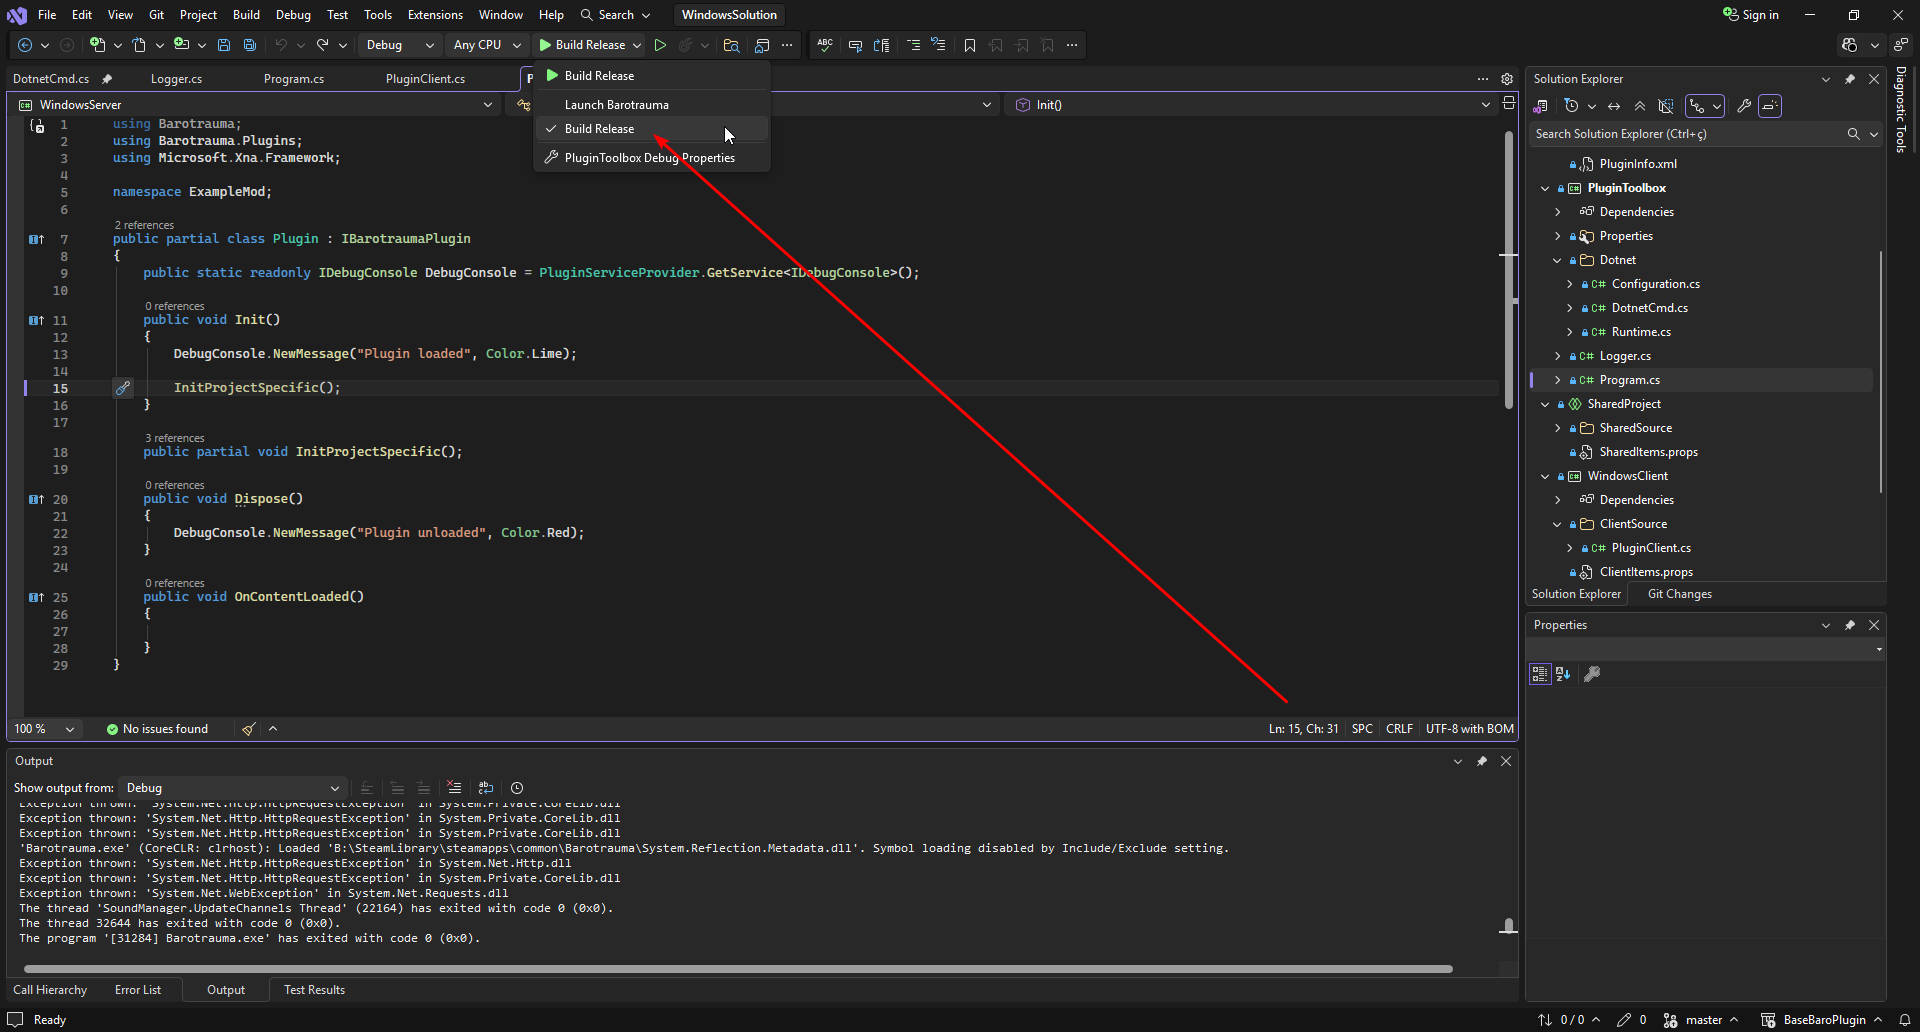
Now click Build Release and the plugin will be built in release mode. Unlike the debug build, this builds the client and the server for Windows, Linux and macOS into your mod’s folder in LocalMods, so the mod works for every player.
Publishing
Publish the mod from LocalMods as described in Publishing to Steam Workshop. See Mods with plugins on that page.
Hot reload
.NET supports Hot Reload, which lets you apply certain code changes while Barotrauma is running, without rebuilding the mod or restarting the game. This is useful for quickly iterating on gameplay logic.
To use Hot Reload in Visual Studio, launch Barotrauma with your plugin enabled. If your IDE is not attached to the Barotrauma process, you can attach the debugger to the running Barotrauma.exe process using Debug → Attach to Process.
Once attached, make changes to your C# code and apply them using Hot Reload (toolbar button) or Alt + F10. If the change is supported, it will be applied immediately and you can test it in-game.
Hot Reload works best for changes inside existing methods. Structural changes such as adding new classes, changing method signatures, or modifying fields usually require reloading the entire mod.